
If you just opened your dryer after a cycle to find that your clothes are still wet, don’t panic.
Although wet clothes after a cycle can be a sign that your dryer needs professional repair, in many cases, it’s a minor issue you can fix yourself.
In this guide, I dive deep into why your dryer isn’t drying clothes and explain, step-by-step, how you can troubleshoot.
So, if your dryer isn’t dryer, or it’s taking much longer than usual, keep reading.
Key Takeaways
If your dryer isn’t drying clothes properly, the cause is usually simple and fixable without a repair technician.
Overloading the drum, mixing heavy and light fabrics, using the wrong cycle, or starting with soaking-wet laundry are the most common mistakes.
Restricted airflow from a clogged lint trap or vent is another frequent issue – clean both regularly to restore performance and reduce fire risk. If the dryer still won’t heat, inspect or replace parts like the heating element, thermal fuse, thermostat, or blower wheel.
In most cases, a quick DIY check of airflow, load size, and settings solves the problem.
Use the links below to navigate this guide:
- Why Your Dryer Isn’t Drying Clothes
- Solution 1: Load Fewer Clothes in the Dryer
- Solution 2: Wash Even Loads
- Solution 3: Remove Excess Moisture Before Drying
- Solution 4: Load Bulky and Lightweight Clothes Separately
- Solution 5: Use a Higher Dry Level
- Solution 6: Clean the Vent
- Solution 7: Seal Interior and Exterior Vent Joints
- Solution 8: Clean the Lint Trap
- Solution 9: Replace the Faulty Heating Element
- Solution 10: Check the Blower Wheel
- Product Manuals for Popular Dryer Brands
- When to Call a Professional Repair Service
Why Your Dryer Isn’t Drying Clothes
There are many reasons why your dryer is not drying clothes. Those reasons might stem from user mistakes, inadequate maintenance, or equipment failure. It might seem simple, but one of the first things to check is the power supply.
Make sure that your dryer is plugged in completely. If the plug is not pushed into the socket, it could account for the issue. You’ll also want to make sure that your power supply is adequate for your dryer.
Typically, a dryer requires 240 volts or more to run properly. Check your outlet to test and verify that it provides enough power, or check with a professional for assistance.
Once you’ve verified your dryer is properly plugged in and getting enough juice, you can begin troubleshooting other possible reasons, including:
- Improper use
- Clogged air vents
- Maintenance issues
- Part malfunctions or wear and tear
Many of these situations require only simple DIY solutions (which I cover in the next section).
Improper Use
Here are some common scenarios you might encounter:
- Putting too many clothes into the dryer: Dryers rely on heat and airflow. As the drum in your dryer turns, hot air blows onto your clothing. The tumbling effect spreads the air, warming the water in the clothes and turning it into steam. Airflow removes the steam from the dryer. Check the manufacturer’s instructions to see the maximum loads for your dryer. Newer models have sensors and will turn off if the drum is overloaded.
- Using the wrong settings: Bulky items such as towels, bedding, or bathroom rugs may require a higher heat setting to dry properly. Your user manual will help you select the correct dryer setting.
- Washing uneven loads: Group similar clothing together for the best outcome. If you dry light clothes and heavy clothes in the same load, it can produce an even result, leaving heavier clothes damp or overdrying the lighter clothes.
- Washing soaking wet clothes: If your clothes are dripping wet, it puts unnecessary stress on your dryer. You may find yourself running several cycles to get the job done, a significant strain on energy costs as well.
Clogged Air Vents
Check your air vents to ensure good airflow. For a vented dryer, go to the vent outside of your home. Place your hand near the vent during a cycle to check for a steady stream of warm air. If the airflow is poor or non-existent, you may have blockages. Cleaning your air vent is also a good idea to prevent fires.
Side note: Ventless dryers, such as condenser dryers and heat pump dryers, recirculate air and extract moisture from clothes without high heat. While there are no clogged air vents to consider, such models are often more expensive than vented dryers. Learn more in my comparison of vented vs. ventless dryers.
Maintenance Issues
Consistent maintenance goes a long way. One of the best steps you can take is to clean the lint screen after each drying cycle. A dirty lint screen can restrict airflow and clog the air vent.
Part Malfunctions or Wear-and-Tear
Unfortunately, parts wear out over time. Issues often include:
- Heating element: The heating element controls how warm or hot the dryer gets and is powered by gas or electricity. In an electric dryer, the assembly looks like one large coil or a collection of smaller metal coils. Gas models utilize an igniter. Although a heating element on a dryer can wear out over time, poor maintenance and operation can speed the process.
- Thermal fuse: This device protects your dryer from overheating. If your dryer overheats, the fuse will blow and prevent the heating element from delivering hot air to the drum. Depending on your dryer, there may be several fuses.
- Thermostat: This part monitors the dryer’s temperature and will shut off the dryer to avoid overheating. Depending on your model, you may have one or two thermostats (cycling thermostat and high limit thermostat). If either thermostat is faulty, the heating element won’t properly work.
- Sensors: Newer dryers have sensors to monitor heat performance and the dampness of clothes. Faulty sensors can cause the appliance not to heat at all or to keep running unnecessarily.
- Valve solenoid coils (gas dryers): These coils open the valve to allow gas to flow properly into the solenoid assembly. Once there, the igniter begins the flame. If the igniter clicks without a flame, one or more coils have failed.
- Control board (electric dryers): This is an electronic board, much like the motherboard in a computer. This is rarely the issue, but burnt or shorted out sections of the board can impact performance.
Now that I’ve covered some reasons why your dryer isn’t drying clothes, let’s get into the do-it-yourself solutions.
Solution 1: Load Fewer Clothes in the Dryer
Believe it or not, every item of clothing doesn’t need to be dried by machine. You can cut down on loads by purchasing a drying rack. Hang some clothes for drying and load the others into the dryer.
It’s easy to overload your dryer. Visually, you’ll feel like there is more room to add clothes, but functionally, too many clothes can hinder performance.
Overloading the dryer not only decreases its energy efficiency but also impacts the airflow and increases lint production. Your dryer works harder to dry a big load, causing stress to the motor and heating element.
To avoid dryer overload, follow these steps:
- Check the user guide to determine the dryer capacity. In general, your dryer should have twice the capacity of your washer so that it can safely handle the maximum load. For example, a 2.5 cubic foot capacity washer should pair with a dryer with at least 5 cubic feet of capacity.
- Choose the right drying cycle. Study the drying cycles in the user’s guide to determine the best one to use for what you are drying. You might want to choose sensor-guided cycles over timed cycles for the most efficiency.
- Shake and load clothes loosely into the dryer drum. Balled up clothing will impact drying time (See Solution 4 for more tips).
- Leave enough room for clothes to tumble freely. You should see them rising and falling while the drying cycle runs. A good rule of thumb is to leave ¼ to ½ of the dryer empty.
Check out this helpful video discussing tips and tricks for efficient drying.
Solution 2: Wash Even Loads
Washing even loads is as simple as drying groups of clothes that are similar in bulk. Mixing thick, heavy towels with thin t-shirts might result in the shirts being dry long before the towels, prompting you to keep running cycles until everything is dry.
Washing uneven loads can stress the dryer’s sensors, motor, fuses, and thermostat, causing them to fail. Overloaded dryers can also damage the drum over time.
To wash even loads, follow these steps:
- Sort dirty laundry by weight. Place towels together. Group sheets together. You get the idea. In many cases, especially with advances in laundry technology, you can mix colors without an issue.
- Add the grouped clothing or linens loosely into the dryer drum. Leave enough space for them to tumble freely (as mentioned in Solution 1).
- Select the appropriate drying cycle.
Want more laundry hacks? Check out this video that explains washing and drying even loads (and much more).
Solution 3: Remove Excess Moisture Before Drying
A properly functioning washer will wring clothes of excess moisture in its final cycles. If this isn’t happening, you need to troubleshoot your washer or seek the help of a professional. If you are washing fabric by hand, make sure to wring it out.
Avoid adding dripping wet garments into a dryer. Doing so can overwork the dryer drum, stress the heating element, and break the dryer.
Below are a few tips to consider:
- Use a high-powered spin cycle or an extra spin cycle. This will drain as much water as possible from your clothing or linens.
- Hang soaking wet clothes (especially if you get caught in the rain). Allow the excess water to drip off into a tub. You can also use a blow dryer to help the water evaporate.
- Wring out excess water. If you’re handwashing certain items, be sure to wring them out as much as you can before putting them in the dryer.
Solution 4: Load Bulky and Lightweight Clothes Separately
Try not to dump wadded, wet clothes in your dryer. Doing so could overwork the tumbling function of your drum and tax the tumbling mechanism over time. This can include the motor, drive bolt, pulley, idler, and other parts.
Also, tangled clothes can restrict airflow, causing faulty thermostat readings or overheating. This can impact the heating element, fuses, and sensors. It might not cause an issue at first, but it can degrade your dryer’s effectiveness over time.
Use these steps to load clothes separately:
- Pull apart clothes that got tangled in the wash.
- Unfold individual pieces that turned inside out, such as socks, pant legs, and sleeves.
- Shake out each piece and place it loosely in the dryer drum.
- Leave enough room for them to tumble freely (See Solution 1 to avoid overloading).
Solution 5: Use a Higher Dry Level
Sometimes your clothes aren’t drying because you select the wrong cycle or not enough heat for the job.
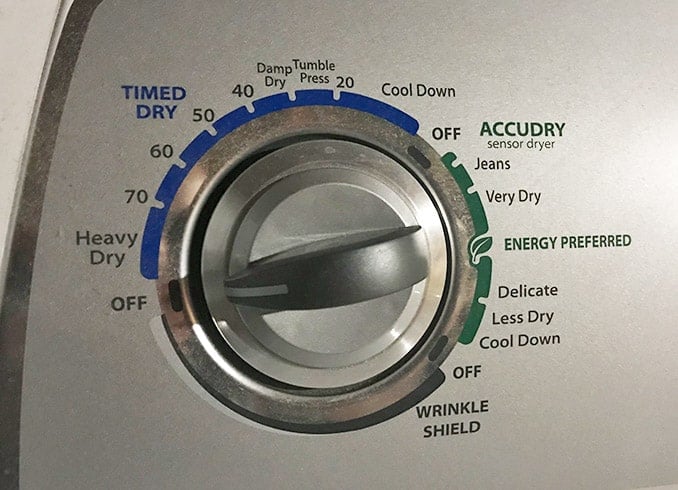
If your default choice is timed dry, consider other options based on what you are drying. Although dryer models vary, here are some common cycles:
- No heat (air fluff or dry): Good for pillows, coats, or comforters to shape and loosen wrinkles, but will not completely dry the items.
- Delicate: Perfect for delicate or thin clothing made of silk, rayon, or containing intricate details such as embroidery, decals, screen printing.
- Permanent Press: A catch-all cycle for synthetic fabrics, linen, or lightweight fabrics.
- Timed: A cycle that runs for a set time and alternates the heating intensity.
- Sensor (automatic): This cycle senses the amount of moisture in the clothes and adjusts to accommodate efficient drying.
Choosing the wrong cycle can overwork or overheat your dryer and eventually cause failures in the heating element, fuses, thermostat, and sensors. If you are using timed drying and finding that your clothes are taking more than an hour to dry, you might be using the wrong cycle.
To choose the best cycle, follow these steps:
- Consult the user manual to choose the best cycle for your load.
- Make adjustments to increase heat settings or choose a sensor cycle.
- To test the cycle’s effectiveness, pause the drying cycle, and check for dampness level.
You may have to test out several cycles until you find the sweet spot. If you have a sensor cycle, try it out. This video by LG explains sensor-dry cycles.
Solution 6: Clean the Vent
Cleaning the vent is a great way to keep your dryer functioning at peak performance. Clean your vents every 6 to 12 months for optimal performance and to avoid the risk of fire.
A clogged vent can impact airflow and damage the dryer.
To clean your dryer vent:
- Choose whether you will clean inside or outside. The right approach depends on how your ducts are set up. For example, if your duct is near your roof, you may want to avoid being on a ladder.
- Purchase a dryer cleaner kit. Consult your manufacturer’s guide to get helpful tips on the best way to clean the vent, including recommended cleaning tools.
- Unplug your dryer. If you have a gas dryer, turn off the gas. Practice safety guidelines whenever working with electrical or gas-powered appliances.
- Detach the air vent hose from the dryer. Use your hands to remove visible chunks of lint.
- Vacuum the area around and just inside the dryer at the vent hose connection. Be careful sticking a vacuum deep into your dryer as you could damage parts.
- Prepare your dryer cleaning kit. These kits are often designed to work with a drill and include auger brushes on rods. Please read the directions for use and never run the drill in reverse.
- Remove and clean the outside vent protector. Use the cleaning kit.
- Reattach the outside vent protector and the indoor hose.
- Restore power (and turn on the gas line if you have a gas appliance).
- Run the dryer and check the outside vent. The flap should be opening wide as the air escapes.
You can watch a helpful video about cleaning your dryer air vent here.
Side note: If you have a mesh screen or some other part across the opening of your outside dryer vent to keep critters out of your home, know it is a high hazard for trapping lint. A flap that only opens when the dryer is running is the safest. Additionally, if you use a flexible vinyl hose to vent your dryer, replace it as soon as possible. The National Fire Prevention Association recommends rigid or flexible metal venting hoses.
Solution 7: Seal Interior and Exterior Vent Joints
A good seal makes all the difference. Poor sealing causes air to escape, impacting airflow and trapping excess lint around screws and rivets. Any obstruction to airflow, such as excess lint, can cause overheating and increase the risk for a fire.
At each duct connection (joint), follow these steps:
- Inspect all interior vent joints for signs of air leaks. That may include dust or lint around the connections.
- Apply heat-resistant aluminum tape around each joint. Never use duct tape, as it’s not heat resistant and can melt, increasing the risk of fire.
- Run the dryer and look for signs of leaks. Use your hand to search for leaks. Be careful using tools like smoke pens as these tools can cause fires when used around combustible materials.
- If you have exterior vent joints, repeat steps 1 – 3.
Check out this helpful video from The Home Depot on how to install dryer vents.
Solution 8: Clean the Lint Trap
Keeping your lint trap clean is the simplest action to keep your dryer working well.

Make it a habit to clean the lint trap after every drying cycle. Clogged lint traps can block airflow and increase the risk of fire.
Be sure to check under or near the lint trap for excess lint and remove it by hand, or a small wand attachment or the crevice tool on a vacuum cleaner.
To keep your lint screen clean:
- Remove the lint screen.
- Use your hand to remove all visible lint.
- Replace the lint screen.
Side note: If you use fabric softener or dryer sheets, wash your lint trap in warm soapy water every six months. Use a toothbrush to scrub the mesh. Ensure the lint trap is completely dry before placing it back into your dryer.
Solution 9: Replace the Faulty Heating Element
The heating element is what provides heat for the drying process. If your dryer isn’t blowing hot air, it is most likely due to a faulty heating element.
You can purchase a new one for your model online or at a local hardware store. If your thermostat is attached to the old heating element, remember to attach it to the new one.
You can do this repair on your own, but, to be completely honest, this solution is much more complicated than the others. So, if you don’t feel completely comfortable, call a professional.
While each model will have specific instructions on how to replace a faulty heating element, here are the basic steps:
- Turn off the power to the dryer. If you have a gas-powered dryer, turn off the gas to the dryer as well while you’re performing repairs.
- Following the manufacturer’s instructions, open the dryer to reveal the heating assembly. Keep track of all the screws and where they go. Keep note of any connections you unplugged so that you can safely reconnect everything when you are finished.
- Remove the heating element assembly.
- Clean the assembly with a dry microfiber cloth before installing the new heating element.
- Connect any necessary wires to the new heating element.
- Install the heating assembly, including all wires and screws, into the dryer.
- Close the dryer, referring to the manufacturer’s instructions.
- Reconnect the power and turn on the gas (for gas models).
- Test the dryer. It should be blowing hot air.
To get an idea of how to replace the heating element, watch this video.
Side note: Always wear proper safety equipment. You should have safety gloves, goggles, and boots.
Solution 10: Check the Blower Wheel
The blower wheel is responsible for delivering heated air to the dryer. It sucks air into the dryer and blows it across the heating element. If airflow ceases, you may need to replace the blower wheel.
In some cases, the wheel may be in working order, but something could be obstructing it from spinning freely. You can check for cracks or obstructions yourself, but call a professional if you don’t feel comfortable.
This video explains the process, but below are the basic steps:
- Turn off the power to the dryer. If you have a gas-powered dryer, also turn off the gas supply while you work.
- Following the manufacturer’s instructions, open the dryer to reveal the blower. Keep track of all the screws and where they go. Note the connections you had to unplug so that you can safely reconnect everything when you’re finished.
- Remove the cover to access the blower wheel. Inspect the wheel and the surrounding area. Remove any obstructions. If the blower wheel is damaged, you can find a replacement part online or at a local hardware store.
- If damaged, remove the old blower wheel. Check your manufacturer’s guide to help with removal and installation.
- Install the new blower wheel. Spin it after installation to make sure it moves freely.
- Close the dryer, referring to the manufacturer’s instructions.
- Reconnect the power and turn on the gas (for gas models).
- Test the dryer. It should be blowing hot air properly.
Product Manuals for Popular Dryer Brands
Still not sure what is wrong with your dryer or how to fix it? Here are links to dryer product manuals and tips from some of the most popular brands:
- Amana dryer manuals; Amana dryer help
- Electrolux dryer info*, Electrolux dryer FAQ
- Fisher & Paykel dryer manuals*, Fisher & Paykel product help
- Frigidaire dryer manuals*, Frigidaire dryer FAQ
- GE dryer manuals, GE product support library
- Hotpoint dryer manuals*, Hotpoint product support
- Kenmore dryer manuals*, Kenmore product support
- LG dryer manuals, LG help library
- Maytag dryer manuals*, Maytag info library
- Samsung dryer manuals*, Samsung product support
- Speed Queen dryer manuals*
- Whirlpool dryer manuals, Whirlpool dryer help
*Dryer manuals are accessible through dryer product pages on the manufacturers’ websites and retailer websites like HomeDepot.com.
When to Call a Professional Repair Service
Discovering that your clothes are still wet at the end of a drying cycle can be a scary situation.
The good news is that, in most cases, it’s a minor issue that you can fix on your own.
Start with the basics:
- Is the dryer plugged in?
- Is the drum overloaded?
- Did the washer wring out the clothes enough before you put them in the dryer?
- Is the lint trap and vent clean?
If you check all those boxes and the dryer still isn’t drying your clothes, it might be something more serious. Issues with the heating element and blower wheel are common, but other parts could be malfunctioning too.
Depending on your comfort level, you can continue to troubleshoot. But, for most homeowners, now is the time to call a professional.
If you don’t already have a trusted repairman, you can get completely free, no-obligation quotes from local pros on HomeAdvisor.com. I love this site because it allows you to compare prices and get the best deals.
Related Topics
- Speed Queen TC5 vs. TR5 Washers: 8 Differences Explained
- Vented vs. Ventless Dryers: Key Differences & How to Choose
- The Most Reliable Washer and Dryer Brands (and Brands to Avoid)
- 6 Ways to Fix Standing Water in the Bottom of Your Dishwasher
- How to Fix a Weak Flushing Toilet (8 Simple Solutions)
- Tankless Water Heaters: 7 Pros and 6 Cons You Need to Know
- How Long Do Hot Water Heaters Last? (and How to Extend Their Life)
- How Long Do Dishwashers Last on Average?
- 4 Ways to Unclog a Drain When Drano Is Not Working
- The Ultimate Home Maintenance Checklist (Printable)
- HomeAdvisor vs. Angie’s List: Differences, Similarities, Pros, and Cons
- How to Clean Stainless Steel Appliances Without Streaking
- Average Washing Machine and Dryer Weight (With 40 Examples)
- Liquid-Plumr vs. Drano: Which Drain Cleaner Is Better?
- Green Gobbler vs. Drano: Which Drain Cleaner Is Better?
- Does Green Gobbler Work? How Does It Work? An In-Depth Review
