
Seasoning carbon steel cookware doesn’t have to be difficult. With just a few simple steps, you can create a smooth, non-stick, rust-resistant surface.
But many first-timers make mistakes that ruin the seasoning.
In this guide, I explain my proven method for seasoning carbon steel. I also highlight the common mistakes to avoid to ensure a perfect seasoning every time.
This process is guaranteed to work, and I have the before and after pictures to prove it.
No more struggling with sticky, blotchy seasoning that chips and flakes off. My technique will help you season like a pro your first time.
Use the links below to navigate the guide:
- How to Season a Carbon Steel: Key Takeaways
- Video Summary
- Step 1: Remove the Protective Coating / Clean the Pan
- Step 2: Dry the Pan
- Step 3: Coat the Pan
- Step 4: Bake the Pan
- Before and After Seasoning a Carbon Steel Pan
Key Takeaways
Here’s a quick explanation of how to season a carbon steel pan. Throughout the full guide, I explain each step in detail and share tips for avoiding common mistakes.
Step 1: Clean/Remove the Coating – Scrub new pans with soap and water to remove the protective coating that prevents seasoning from sticking. For used pans, wash away any food residues and use steel wool to remove rust and uneven seasoning layers until you get down to the bare metal.
Step 2: Dry the Pan – Thoroughly dry the pan with a towel, then place it upside down in a 250°F oven or heat it on the stove for a few minutes to evaporate any remaining moisture. Heating the pan ensures the surface is completely dry and makes it easier to coat with a thin layer of oil.
Step 3: Coat the Pan – Once cleaned and dried, rub a small amount of high smoke point, neutral flavor oil over the entire pan using a lint-free cloth. Spread the oil evenly into a thin layer, then wipe off any excess until the surface has a slight sheen (it should not be glistening or look wet).
Step 4: Bake the Pan – With the oven set to 25°F above the oil’s smoke point, place the pan upside-down on the middle rack with a baking sheet on the lower rack. Once the oven is fully preheated, let the skillet bake for 15 minutes, then wipe off excess oil and return the skillet to the oven for 45 more minutes. After baking for a full hour, turn off the heat and let it cool in the oven for an hour so the oil can fully polymerize.
Video Summary
Want to see the steps in action? Watch me season a brand-new carbon steel pan using the exact steps I cover in this guide.
Step 1: Remove the Protective Coating / Clean the Pan
If you’re seasoning a brand-new pan, the first step is to remove the manufacturer’s protective coating.
Even the slightest amount of moisture can cause an unseasoned carbon steel pan to rust, so most manufacturers coat the surface in a thin layer of beeswax or oil before shipping it.
Although the coating prevents rust, it also prevents your seasoning from adhering. So don’t make the mistake of trying to season over it.
To remove the coating, give the pan a good scrub with soap and water. It may take a few minutes. Since the coating is thin and transparent, knowing when you’ve removed it all can be challenging.

But instead of guessing, you can conduct the squeak test. Rub your finger over the pan while it’s damp. Your finger will run smoothly over the bare pan and “squeak” against any remaining spots of protective coating. If the surface isn’t smooth, keep scrubbing.
If you’re seasoning a used pan, you’ll still want to thoroughly clean the surface before re-seasoning. Wash the pan with hot, soapy water to remove any stuck-on food residues.
If there is rust or uneven layers of baked-on oil from previous seasonings, use steel wool or a chainmail scrubber to remove it gently.
The goal is to strip the pan down to the bare metal before beginning the seasoning process. Thoroughly stripping the pan ensures the new seasoning will properly adhere and build up smoothly.
Step 2: Dry the Pan
The next step is to dry the pan completely. Wipe it with a towel, then put it upside down in the oven preheated at 250°F/121°C for 10 minutes to evaporate the rest of the moisture. You can also heat it on the stove for a few minutes.

Even if your pan looks dry after wiping it with a towel, I highly recommend heating it in the oven or on the stove. Even the tiniest amount of moisture can prevent the oil from bonding to the carbon steel.
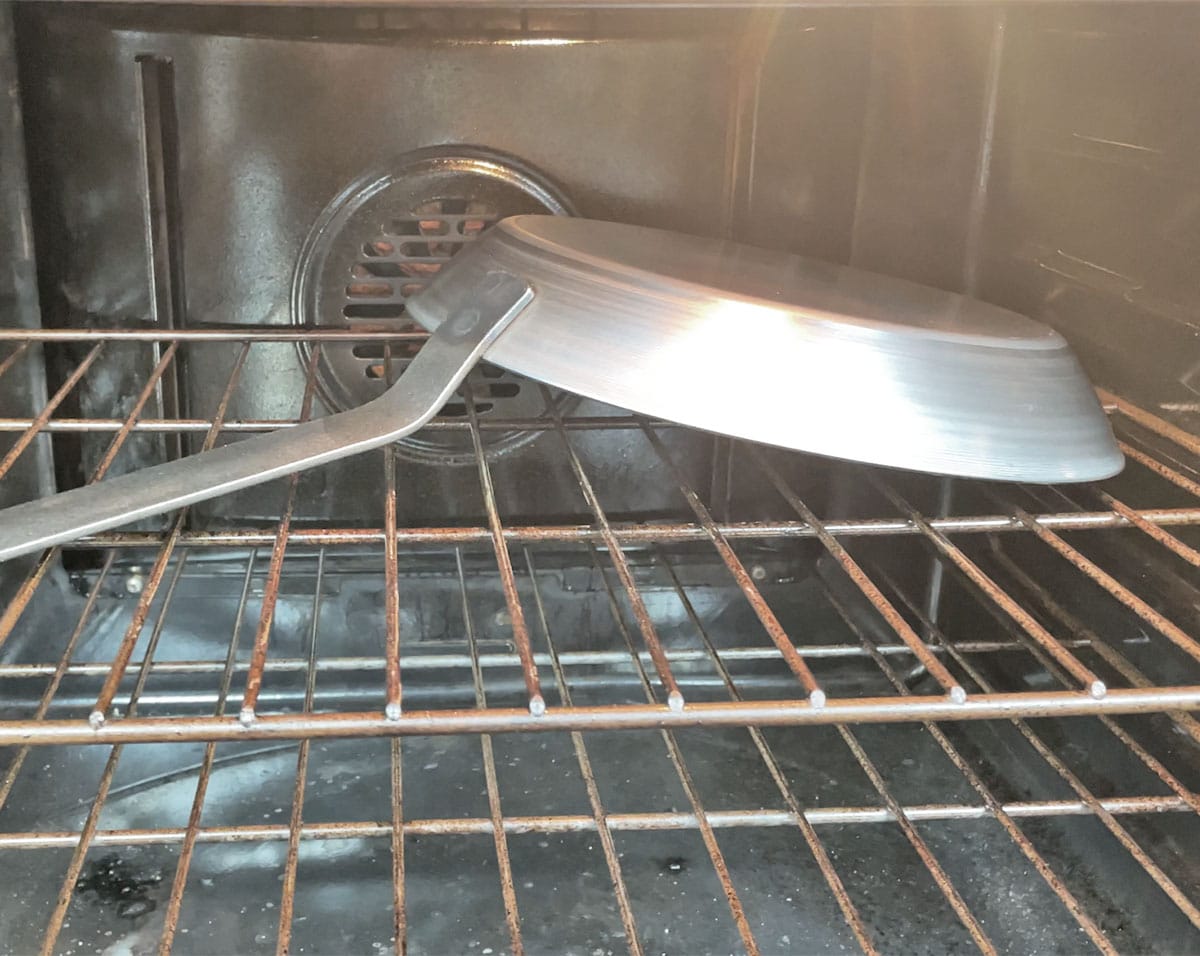
Plus, it’s easier to spread a thin layer of oil on a warm pan. When the oil is heated, it becomes more fluid and coats the surface evenly.
Step 3: Coat the Pan
Once the pan is clean and dry, put on an oven mitt and remove it from the oven.
Use a lint-free towel to rub a small amount of oil on the entire surface. Make sure to get the inside and outside.
If the pan you’re seasoning has a carbon steel handle you also want to coat the handle. If the handle of your pan is made of stainless steel, there’s no need to oil it because stainless steel is inherently rust-resistant.
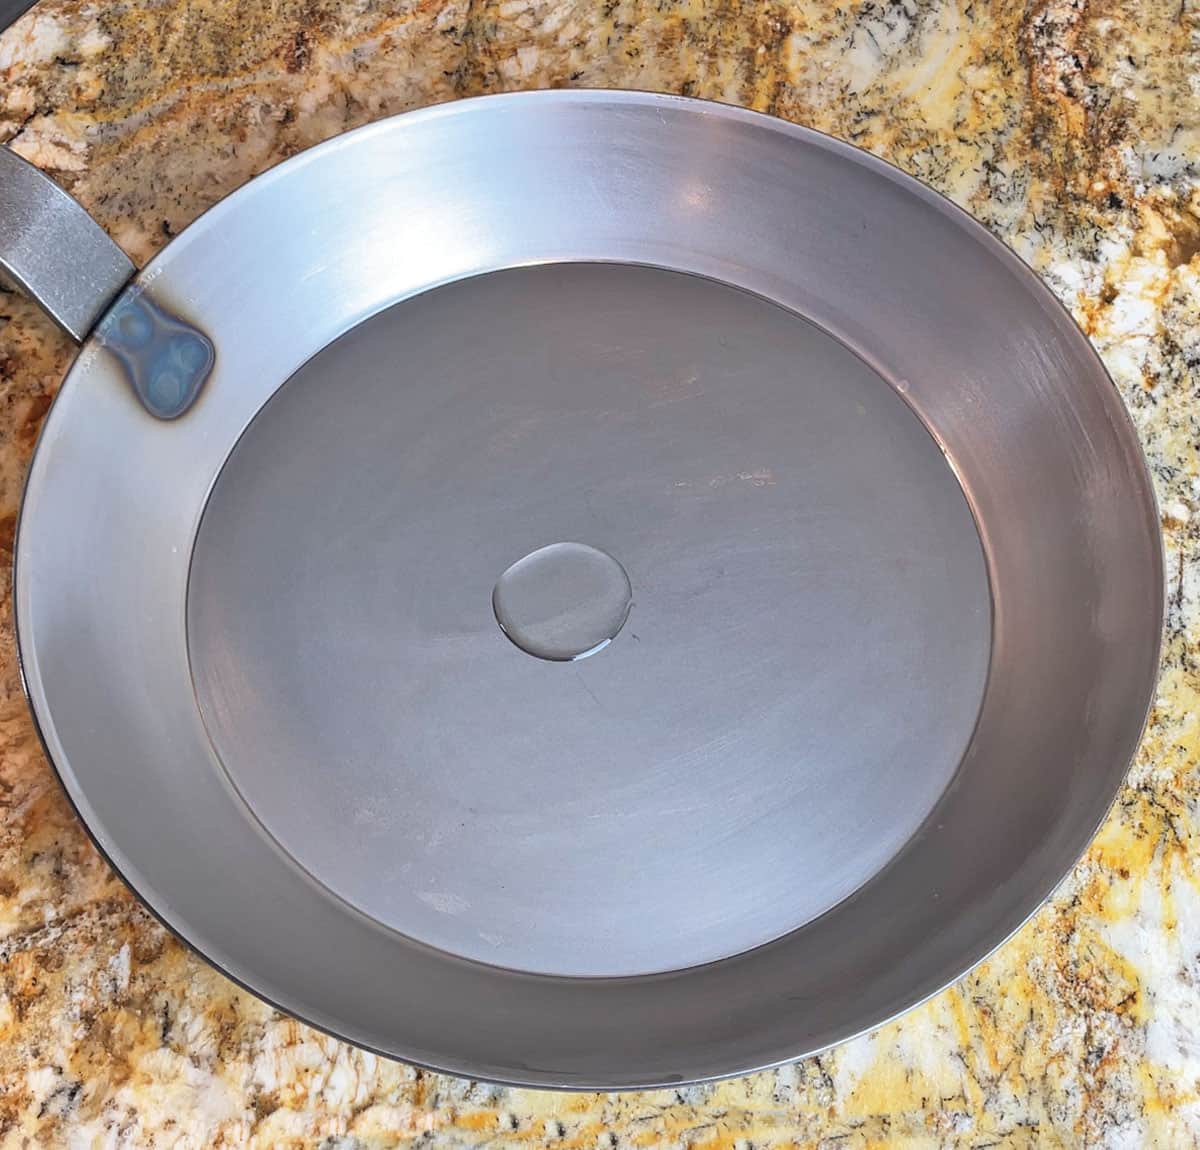
The key to this step is to use a small amount of oil, about the size of a quarter, and spread it until it’s completely even.
Be sure to use lint-free towels or rags to apply the oil — cheesecloth, automotive towels, or bandanas work well. Any lint or fabric fibers left behind will get stuck in the seasoning, preventing you from achieving a perfectly smooth cooking surface.
After you spread it with one towel, take another and wipe it down as if you’re trying to wipe the oil off. The surface should have a slight sheen, but it should not look wet or glistening. If it’s glistening, you’ve used too much.

One of the most common mistakes when seasoning carbon steel is using too much oil or not wiping it off enough before baking. If you use too much oil, you’ll end up with a sticky, gummy surface that will eventually flake off.
There’s debate in online forums about what kind of oil to use. But most experts agree that oils with a smoke point above 400°F with a neutral flavor work best. Soybean, peanut, sunflower, grapeseed, and canola are good options. I like to use grapeseed oil because it’s relatively cheap, the smoke point is 420°F, and it has a neutral flavor.

Avoid extra virgin olive oil, butter, and other oils with smoke points below 400°F. Also, avoid lard, bacon grease, and other animal-based fats because those will go rancid unless you use your pan multiple times a day every day.
Flaxseed oil is often touted online for seasoning cast iron and carbon steel. However, it has a low smoke point of only 225°F. It hardens quickly but lacks robustness, so it flakes off easily. Flaxseed oil also has a pungent odor, short shelf life, and goes rancid quickly.
Plus, it’s expensive and varies in quality and freshness depending on the brand and where it’s purchased. Because of that, it’s hard to get consistent seasoning results.
The chart below breaks down the characteristics of common oils to help you decide which to use.
| Oil | Smoke Point | Neutral Flavor? | Ideal for Seasoning Carbon Steel? | Notes |
|---|---|---|---|---|
| Avocado Oil | 520°F | No | Yes | High smoke point, but imparts flavor |
| Safflower Oil | 500°F | Yes | Yes | Very high smoke point, neutral flavor |
| Refined Olive Oil | 465°F | Yes | No | Refining removes flavor and increases smoke point |
| Soybean Oil | 450°F | Yes | Yes | Neutral flavor, high smoke point |
| Peanut Oil | 450°F | Yes | Yes | High smoke point, imparts nutty flavor |
| Corn Oil | 450°F | Yes | Yes | Neutral, budget-friendly high smoke point oil |
| Sesame Oil | 450°F | No | No | Strong sesame flavor |
| Sunflower Oil | 440°F | Yes | Yes | Light flavor, high smoke point |
| Canola Oil | 425°F | Yes | Yes | Neutral flavor, high smoke point, inexpensive |
| Grapeseed Oil | 420°F | Yes | Yes | Neutral flavor, high smoke point, affordable |
| Vegetable Oil | 400°F | Yes | Yes | Typically soybean or canola, neutral flavor |
| Extra Virgin Olive Oil | 375°F | No | No | Low smoke point, imparts flavor |
| Coconut Oil | 350°F | No | No | Low smoke point, imparts flavor |
| Flaxseed Oil | 225°F | No | No | Prone to rancidity, low smoke point |
Step 4: Bake the Pan
The final step is to bake the pan. Before you do this, make sure the handle is oven-safe. Most carbon steel pan have oven-safe handles, but some, like De Buyer Mineral B, have epoxy-coated handles that are only safe in the oven for short periods.
If the handle is not oven-safe, you’ll have to heat the pan on the stove (follow these instructions).
Once you’ve confirmed your pan is oven-safe, place it in the oven upside down on the middle rack and place a baking sheet on the lower rack to catch any drippings.

If you applied the oil in the previous step correctly, the baking sheet is unnecessary since there won’t be any oil dripping. But I recommend putting the baking sheet there, just in case.
The most common mistake people make during this step is not baking the pan at a high enough temperature. For the oil to properly polymerize and bond to the carbon steel, it needs to be heated slightly above the oil’s smoke point. Since ovens are not 100% accurate, aim for 25 degrees higher than the oil’s smoke point.
For example, if you’re grapeseed oil with a smoke point of 420°F, bake the pan at 445°F. You don’t need to preheat the oven; just let the pan heat up gradually as the oven heats.
Once the oven reaches 25°F above the oil’s smoke point, let the pan bake for 15 minutes. Then, carefully take it out and wipe down any excess oil.
If you followed the instructions in Step 3 and didn’t apply too much oil, there shouldn’t be any excess oil to wipe. But I highly recommend taking this step just in case.
After you wipe the pan, put it back in the oven for another 45 minutes.
People often make the mistake of not letting the pan bake long enough. It takes time for the oil to polymerize and bond to the carbon steel. Pick a time when you’ll be home, and you don’t need to use the oven for other meals.
After the full hour, turn the heat off and let the pan cool in the oven for an hour.
Before and After Seasoning a Carbon Steel Pan
There’s debate over how many layers of seasoning are needed. Some say one round is enough, while others claim three to five rounds create the best protective surface.
Based on my experience seasoning dozens of carbon steel skillets and woks, two times is usually enough. After that, it’s best to start cooking.
You’ll know the seasoning layers are building up properly when the cooking surface takes on a darker brownish hue and is no longer silver/gray like bare, unseasoned carbon steel. The pan should have an even, non-sticky coating that is smooth to the touch.
Here’s how a carbon steel pan looks before seasoning:

Here’s how it looks after one round of seasoning using my method:

And here it is after two rounds of seasoning:

If you follow these steps, the result will be a smooth layer of seasoning that prevents rust and makes it easy to cook eggs, burgers, vegetables, and any other food without sticking.
Questions? Let me know in the comments below.
Related Topics
- Carbon Steel vs. Stainless Steel Pans: What’s the Difference?
- Strata Cookware Review: The Most Unique Pan Ever Made?
- Carbon Steel vs. Non-Stick Cookware: 10 Key Differences
- Carbon Steel vs. Cast Iron Cookware: 10 Differences You Need to Know
- Carbon Steel Cookware Pros and Cons
- The 6 Best Frying Pan Materials (With Comparison Chart)
- Made In Carbon Steel Cookware Review
- Misen Carbon Steel Cookware Review


Thanks so much for the post. I followed your method and now have a seasoned carbon steel omelette pan and two seasoned steel baking pans. They are looking fantastic.
Love to hear this!
Great information! Thanks for sharing. I have a question…
You said “Step 4: Bake the Pan – With the oven preheated to 25°F above the oil’s smoke point, place the pan upside-down on the middle rack with a baking sheet on the lower rack.” Then in the details, you said, “You don’t need to preheat the oven; just let the pan heat up gradually as the oven heats.” So, preheat or don’t preheat?
And, how often does a carbon steel pan need to be treated? I use my pan almost daily and put oil on it after every use. I’m thinking that may not be necessary now.
Thanks!
Hi Diane, That’s a good catch. You don’t need to preheat the oven. The first quote should have said, “With the oven set to 25°F above the oil’s smoke point…” I’ve updated the article to reflect that.
If you use your skillet often and have no issues with rust or food sticking, don’t worry. But if the surface looks silvery or blotchy and eggs, fish, and other delicate foods stick, it’s a good sign that the skillet needs seasoning.
I hope this helps.
Andrew